Overblog
Follow this blog Administration + Create my blog
December 26 2012 3 26 /12 /December /2012 08:50

THOSE WHO received a new Apple IOS device this Christmas have over one million apps to download from the Apple App Store. So here's a run down of our top 10 most fun apps to help you narrow down the best and most fun among them.

Spotify

Spotify is the best for music streaming

Music streaming service Spotify is by far one of the most fun and essential apps to have on your IOS device during your festive holidays. With access to millions of songs on your Iphone, Ipad and Ipod Touch, think of the endless possible Christmas playlists you could create from your mobile device.

The app is easy to use and allows you to make any playlist offline, storing the songs in the playlists you've created onto your phone so that you can listen to it when you haven't got access to a WiFi or 3G connection.

Linked to your Facebook, the Spotify app allows you to share tracks with friends who aren't members of the service. And not to worry, you can always put it on private mode in case you're worried your friends will chastise you for listening to your guilty pleasures.

The app is free to download but if you want unlimited access to Spotify content on your mobile device, you'll have to subscribe to the £9.99 per month package. Completely worth every penny, if you ask us.

Pocketbooth
pocket booth app for iphoen and ipad

Pocketbooth is possibly the most fun you could have with your camera-phone. Once launched, you can begin snapping pictures of you and friends in a traditional four-strip photobooth style instantly. Working across both front facing and rear facing cameras, the app takes four snaps per photo strip, allowing you to pull a multiplicity of gurns and grins before saving the strip as an image to the camera roll.

The strips can be altered via size, filter effect and borders. If you're wanting the picture in physical form, Pocketbooth allows you to order a print for £2 a pop with its delivery service.

If you're too impatient to wait for professional prints though, you can always do it yourself via an "air print" feature. Alternatively, you can always share your strips over Facebook or Twitter via the app's sharing function. Pocketbooth is just 69p and is a great and fun way for all your friends to see the antics you've been up to this Christmas.

Morfo

morfo app for iphoneDespite the pretty naff name, Morfo is actually really entertaining. As a completely free app, Morfo allows you to quickly turn a photo of you or your friend's face into an animated talking and dancing 3D character.

Once captured, you can make your friend say anything you want in a silly voice, rock out, wear makeup, sport a pair of huge green cat eyes, or suddenly gain lots of weight (though this might not be needed if you gorge as much as we do over the Xmas period).

Morfo also lets you share your 3D creations via social networks such as Facebook and record a message and post a video of the character talking and dancing. You could even use the Morfo app as a unique way to send a greetings card with your festive wishes or Happy New Year's message.

Touch Hockey
Touch hockey for Ipad is hilarious
Flipside 5's Touch Hockey app is by far one of our preferred action games available across the IOS platform.

Fast, fluid and responsive, the game allows you to play against the computer or your friends over a Bluetooth and WiFi connection.

We've played plenty of similar games on the Iphone and Ipad, but the speed of Touch Hockey is unmatched. Play is fast but super fun, with action replays of winning goals adding to the overall excitement of the app. It really will have you on the edge of your seat.

The app is free but those wanting to customise gameplay can do so by downloading the upgrade pack, which costs £1.49 and adds different themes such as neon lit hockey tables and different coloured pucks.

Our favourite feature about Touch Hockey is that it can work with physical pucks available for the Ipad, which it recognises just like a finger, allowing two players to compete on one device in a much more authentic air hockey experience.

Instagram
Instagram is our favourite for image sharing

Being by far one of the best photo-sharing apps out there for its ease of use and speed, Instagram makes our top 10 IOS apps rundown for its ability to ensure hours of fun over the festive period.

Whether it's photos of your pets wearing paper hats from Christmas crackers, or snaps of grub stacked up in front of you, Instagram will let you share enhanced photographs - thanks to the array of built-in filter effects to make them look even better - for all your friends to see on the app and across Facebook, Twitter and Tumblr.

What makes Instagram even better is that it's totally free to download from the app store, and if you're not into sharing snaps, you could always use it to browse other users' pics uploaded around the world via hashtags for inspiration on things to do, places to go, items to buy or food to cook, for example. Instagram is certainly one of our favourite apps for IOS.

Scrabble

scrabble-app-for-iphone
Scrabble for the Iphone and Ipad is perhaps one of the best games to really get your brain ticking over. Though it will provoke much deep thought in you, it's still one of the most fun and our favourite games on IOS.

The game allows you to play friends over Facebook to see who among your clan should really read a dictionary. And if you have no friends, it's not a problem as you can always play against the computer.

With the ability to have 50 games on the go at once, and share your best scores on a leader board on Facebook, Scrabble is a great social game. The unique feature about the app is that it allows players to connect over one WiFi connection to use an Ipad as the board, with each player's phone holding their row of letters.

Enabled with HD quality graphics made to maximize the Retina display, the Scrabble app will bring you plenty of mind-boggling fun this Christmas time, whether it's with your family, friends or just by yourself.

Vimeo

The vimeo app for iphone is one of our favourites for video streaming
Being one of our favourite video streaming websites, it's no real surprise the Vimeo app for IOS makes it on to our top 10 most fun apps list. Not only does the app deliver the most arty and creative clips on the internet, but it's also a pleasure to navigate around.

The Vimeo app's layout and design means it's responsive, smooth and intuitive, with the video browsing section loading quickly and making it easy to find the most eye-catching, thought-provoking and amusing videos from around the world.

The Vimeo app is completely free, and has four main tabs running along the bottom, including a feed of videos you're most likely to be interested in according to your likes, an explore tab that lets you search the database, an upload tab to add your own clips, and a watch later tab, allowing you to store lists of videos you'd like to view later on.

Vimeo has the potential to provide hours of video streaming entertainment, and is an essential app for those winter days indoors when the comfort of movie-watching is how you plan to spend your evening.

Cut the Rope

Cut the Rope app for iphone and ipad is the best for puzzle fun
Christmas usually gives us plenty of free time to spend as we like, such as eat all that festive food. But if you're too full up to munch on anything else, there's always the Cut the Rope puzzle game to keep your mind occupied, even if your body is not.

Having 250 million downloads around the world thus far, Cut the Rope is a highly addictive game with over 300 levels.

The physics-based game allows you to collect gold stars, discover hidden prizes and unlock new levels as you advance through them. What's more, there's a nifty 3D character add-on available that allows you to play Cut the Rope on Ipad in a more interactive way.

Cut the Rope will set you back a modest 69p, but provide hours of entertaining gameplay from the get-go.

Song Pop 

song pop game for iphone is the best for music lovers

If you haven't already played it - seriously, where have you been? - Song Pop is an additive music guessing game that pits your tune knowledge against that of your friends'.

Being one of the most fun apps we have played in a long time, Song Pop sets up a tournament between you and one other player, and you take turns to guess a clip from a track, chosen by you or your opponent from a range of categories including pop and rock, across different eras.

You only have 10 seconds to guess what artist sings a particular song, or what the name of the song is being played. The time runs down and the quicker you guess, the more points you earn. The player with the most points at the end wins a coin, which can then be traded in to unlock new playlists to challenge your friends with.

Song Pop is a highly addictive and majorly fun one of a kind app for IOS devices, and without doubt worth a spot on our top 10 list.

Voice Changer Plus

The voice changer plus app can be really funny at times
A simple but hilarious concept: the Voice Changer Plus app by Arf Software is a great laugh, even if it is a cheap one.

Providing a choice of fun voices and sound effects, the Voice Changer Plus app takes your words and converts them into some of 40 voice and background sound effects, from a lazy mouse to a talking guitar.

For £1.49, you can to add the ability to post your recordings onto a social network site, or save them to a device, making it a brilliant way to play practical jokes on friends.

With the ability to apply up to three effects at once, an editing function so you can trim sound clips down and Apple AirPlay support, Voice Changer Plus is one of the most pointless but fun IOS apps out there.

Originally Published at: http://www.theinquirer.net/inquirer/news/2232351/top-10-fun-iphone-and-ipad-apps-at-christmas

Christmas Special Offer!

Looking for the best deals of some software for your Mac? Check this out: http://www.tune4mac.com/merry-christmas-promotion.html to find the best deals for this Christmas.

Share this post
Repost0
December 20 2012 4 20 /12 /December /2012 03:30

Bigger isn't always better. As expected, Apple finally announced and published its iPad mini, which is seen as the biggest competitor to other 7-inch tablets already exist in the small tablet market, such as Google 's Asus-built Nexus 7 and Amazon's Kindle Fire HD. A little bit ironically, the new released iPad mini even became a big competitor to its brother, the iPad series. Anyway, for you who are going to get a small tablet, you may wonder how the three highest-profile competitors--iPad mini, Nexus 7 and Kindle Fire HD compare to each other. Here we are going to make a comparison among those three tablets, in order to help you figure out which one is right for you.

Screen & Display

Let's take a look at the screen first. iPad Mini has the largest screen of 7.9 inches, compared to the 7 inches for Nexus 7 and Kindle Fire HD, while it has the lowest resolution which is 1024x768 pixels and the other two both have 1280x800 pixels.

Weight

The weight is also an important factor when you are considering to bring it with you anywhere you go. iPad Mini is the lightest among the three at 308g, Nexus 7 is only 32g heavier and Kindle Fire HD is the heaviest at 394g.

Performance

Yes, the most important part when you are choosing a tablet is to consider the performance of it. The iPad Mini is running a fast A5 processor and iOS 6.0. Nexus 7 is running 1.7GHz Quad-core NVIDIA Tegra 3 with Android 4.1, while Fire HD is running 1.2GHz TI OMAP4 4460 with Android 4.0.

Performance is fairly similar across the board, despite the use of different innards, though the Kindle Fire lags behind in overall speed. For watching movies, playing games, running apps, and web browsing you should have a good experience on all three, but the Nexus and Mini stand a leg ahead.

Regarding the battery life, the iPad mini edges the win on battery life, but the other two are not far behind. They should all get you through a day of normal use.

For more specifications, please refer to the table below:

  apple ipad mini google nexus 7 amazon kindle fire hd
Product Apple iPad Mini Google Nexus 7 Amazon Kindle Fire HD

Price

$329 (16GB WiFi)
$459 (16GB LTE)
$429 (32GB)
$559 (32GB LTE)
$519 (64GB)
$199 (8GB)
$249 (16GB)
$199 (16GB)
$249 (32GB)
Capacity 16GB / 32GB /64GB 8GB / 16GB 16GB / 32GB
Memory 1GB 1GB 1GB
Interface Lightning Interface 3.5mm headphone micro USB, 3.5mm earphone microSD, micro HDMI, 3.5mm headphone
Front Camera FaceTime HD 1.2 Megapixels HD
Main Camera 5 Megapixel, 1080p video No No
Cellular Network Optional LTE No No
WiFi 802.11a/b/g/n 802.11a/b/g/n 802.11a/b/g/n
Bluetooth 4.0 4.0 3.0
Thickness 7.2mm 10.45mm 10.3mm


Conclusion

If you want to buy a small tablet so you can play games on the go, then look no further than iPad Mini because of the largest screen, fastest processor and largest game selection;

If you are looking for a tablet mainly to play your tunes or read books, the Kindle Fire HD might be it, since it has dual speakers to provide loudest sound;

If you are buying your tablet to watch video, you can turn to the Nexus 7 for it delivers excellent images.

But if your only consideration is the cheapest price, then pick up the Nexus 7. The Google tablet isn't far superior than the Kindle Fire HD, but it has more apps and unlike the Amazon tablet, there are no ads.

Tips for Transferring DRM iTunes Movies to iPad Mini, Nexus 7 and Kindle Fire HD

Got the tablet already? Have you ever thought of watching iTunes movies on your iPad mini, nexus 7 or Kindle Fire HD? Yes but found the iTunes movies can't be imported to your non-Apple devices, such as Google Nexus 7 or Kindle Fire HD? Don't worry. If you are just looking for a way to transfer for iTunes DRM protected movies to your Nexus 7 or Kindle Fire HD or other tablets, you can simply use Noteburner DRM iTunes to Tablet Converter to remove the DRM protection and convert the iTunes movies to Nexus 7 and Kindle Fire HD supported video formats.

If you are running Windows OS, you can refer to Noteburner iTunes to Tablets Converter for Windows.

Relative Guides:

How to Transfer Rented iTunes Movies to iPad Mini on Mac

How to Put iTunes M4V Movies on Nexus 7 Android Tablet

Transfer Play iTunes Movies on Kindle Fire HD

Share this post
Repost0
December 18 2012 2 18 /12 /December /2012 06:30

watch iTunes movies on tv

You may meet or have met this problem:

Purchased or rented a movie from iTunes store but found it's not good enough to watch it on your Mac, because of the small screen. For better video watching experience, you just want to watch that iTunes movie on your home TV with families and friends.

Now here comes the problem: How to do this? How to watch iTunes movies on TV? Yes, this article will introduce you three simple ways to view iTunes movies on your television.

Solution 1. Burn iTunes movies to DVD for watching iTunes movies on TV.

burn itunes movies to dvd

The most poplar way to watch movies on TV is burning the movies to DVD. So it is for iTunes movies. But the most important thing you will notice is that iTunes movies are usually in protected M4V format. That's to say, DRM protected M4V movies cannot be directly burned to DVD without removing the DRM protection. Which means, you need to remove the DRM from iTunes movies first and then burn the DRM-free movies to DVD.

In this way, you can use a professional DRM removal tool to help you remove the DRM from iTunes movies in order to burn them to DVD. The one will recommended to you is called Tune4mac iTunes Movies to TV Converter.

For the tutorial of removing DRM from iTunes movies, you can visit: How to Burn iTunes Movies to DVD on Mac

After the conversion, you can use your own DVD burner to directly burn the converted movies to DVD disc so as to watch the iTunes movies on TV. Or you can use Any Video Converter Ultimate's DVD Creator to burn the movies to DVD for watching it on TV.

Solution 2. Sync iTunes to Apple TV for watching iTunes movies on TV.

sync itunes movies to TV with Apple TV

If you have an Apple TV, things will be easier. You can use Apple TV to connect your iTunes library to your television. That is to say, you just need to sync the movie files from your iTunes library to Apple TV box and you can view the iTunes movies on your TV. But if you don't have Apple TV yet, you can turn to the other two ways in order to watch iTunes movies on TV.

Solution 3. Connect your computer and TV for watching iTunes movies on TV.

connect itunes to TV with HDMI

Another way to watch iTunes movies on TV is to connect your computer with television. You can connect your computer and TV so that when you play iTunes movies on your computer with iTunes, the pictures will display on the TV screen. You can connect your computer and TV with a VGA cable, an HDMI cable or a proper cable adapter (If possible, the latter two are recommended).

Conclusion

Solution 3 is the most direct way to watch iTunes movies on TV. But solution 1 is the most popular way. And yes, solution 2 will be the best if you already have an Apple TV.

By choosing the second way, it means you should open iTunes and connect your computer to your TV every time you want to watch iTunes movies on TV. So if you don't have an Apple TV and want to make things easy, you are recommend to choose the first way. Because the only thing you need to do is to open your DVD player once you want to watch iTunes movies on TV. What's more, if the movies are rented from iTunes, you can simply keep it to your DVD disc in case it will expire.

Download Mac iTunes M4V videos Converter      Purchase DRM iTune to HTC Desire X Converter
Share this post
Repost0
December 14 2012 5 14 /12 /December /2012 06:12

Here we are looking at the final weeks of yet another year. While plenty of media outlets are pushing out best-of lists for 2012, Apple has today announced its own picks for the best movies, App Store games, music, and even podcasts in the iTunes store. The honorees include Action Movie FX as iPhone App of the Year, and The Room as best iPad Game of the Year.iTunes Best of 2012

Apple's annual list of the best in iTunes media crosses the spectrum of all of the company's App Store, iTunes, and iBooks catalogs. Each category includes the "Editor's Choice" nominees over the past year, as well as some obvious selections in-line with top sales spots.

Action Movie FX, the Bad Robot-developed app which allows you to add Hollywood special effects to your iPhone videos took home the honor of iPhone App of the Year. Rayman Jungle Run --recently updated with 10 free levels -- was picked as Best iPhone Game of the Year. Virtual doodle journal Paper by FiftyThree received iPad App of the Year, while creepy puzzle-game The Room locked down the iPad Game of the Year title.

Angry Birds Space was the top selling app of the year for both iPhone and iPad. Carly Rae Jepsen's Call Me Maybe was the top selling song of the year.

The non-iOS categories are a mash-up of popular media, including Frank Ocean as Best New Artist, Peter Heller's The Dog Stars for Best Novel, The Avengers as Best Blockbuster, and Breaking Bad for Best TV Show.

If you're interested in checking out a full list of winners, head over to iTunes to check out all the categories. You'll also find selections broken down by genre within each media type.

Originally Published by: http://www.maclife.com/article/news/apple_announces_best_2012_apps_music_and_more

Useful Tips for You: 

If you own a lot of iTunes movies or music, you are recommended to use Tune4mac  DRM Converter tools to help you to strip the DRM protection from iTunes movies and songs and convert them into non-DRM formats so that you can play them in any devices you like, such as Samsung Galaxy S III, Nokia Lumia 920, HTC One X, etc.

Share this post
Repost0
December 14 2012 5 14 /12 /December /2012 03:28

"The iPad mini looks a lot more like a blown-up iPod touch than a shrunken-down fourth-generation iPad. "

-- Engadget.com

apple ipad mini

So, the long-rumored iPad mini is already here. Have you got it now? How do you think about it? Yes, it's more like a smaller version of iPad 2, right? Especially the same resolution of the screen. But it's no doubt that iPad mini is absolutely the best alternative to read books on it. Or watching movies, if you like. So are you just thinking of converting iTunes movie rentals to iPad mini to keep for a long time rather than 24 hours only? You should continue reading this article, which will tell you how to strip the DRM protection from iTunes rented movies and convert them into iPad mini for backup step by step.

convert itunes movie rentals to ipad mini

You know that the movie rentals on iTunes store can be synced and played on your iPad mini. But you should also know that the rented iTunes movies will be expired once you began to watch them in 24 hours, because of the restriction policy, called DRM FairPlay. So if you want to keep the rentals on your iPad mini for a long time, even forever, you have to first remove the DRM lock and convert the movies to iPad mini supported video formats. In this article, you will meet one of the best iTunes DRM to iPad mini Converter for Mac, that is, Noteburner iTunes DRM Converter Plus.

Noteburner DRM Converter Plus for Mac is dedicated to help iTunes users to unlock the DRM protection from movie purchases and rentals and convert them into iPad mini for watching. With this magic DRM removal tool, you don't need to worry about the expiration of iTunes movie rentals and enjoy them on your iPad mini anytime you like.

Before try Noteburner iTunes to iPad Mini Converter, please make sure you have got those things ready:
Free Trial of Noteburner; iTunes 10 or 11; iPad mini; A Mac.

Tip: If you are Windows user, you will need Noteburner iTunes DRM to iPad Mini Converter for Windows.

How-to: Convert iTunes Movie Rentals to iPad Mini
add iTunes DRM movies
1
Add iTunes Movie Rentals

Launch Noteburner and click Add button to import the movie rentals. You can also drag the rentals to Noteburner.

choose output format
2
Select Output for iPad Mini

Click Profile to choose Customized MPEG-4 as output format, which will fit for your iPad mini. In the right part of the program, you are allowed to set parameters, like video size, bit rate, etc for iPad mini.

start convert iTunes movies to Nexus 4
3
Start to Convert iTunes to iPad Mini

After all things done, you can begin to convert iTunes movie rentals to iPad mini by clicking Convert button.

free download of noteburner m4v converter plus for mac       purchase noteburner m4v converter plus for mac online

More About iPad Mini…

Apple iPad Mini News and Features

Share this post
Repost0
December 13 2012 4 13 /12 /December /2012 10:29


Apple recently released the 11th version of its popular media player iTunes, and its re-design and new features have gained lots of praises from critics of the older versions of iTunes who found the player bloated with features, and difficult to browse.


features of itunes 11

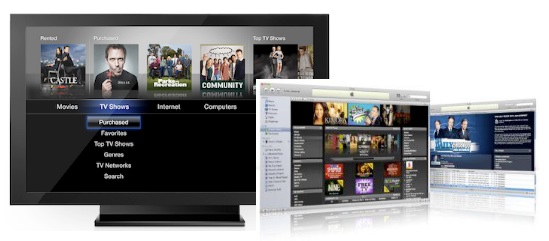
The new version is still a cross-platform Mac and PC player, and it contains nearly all the features of the previous version of iTunes. But the new re-design puts focus on the most used features of iTunes, while tucking other secondary features out of the way. You can now browse their iTunes library as well as parts of the iTunes Store at the same time, and a new MiniPlayer enables you to navigate iTunes using the same features found in the larger main window.

This guide will take you through the new features of iTunes 11, as well as the new Remote iOS app for the player.

From iTunes 10 To 11

After you download iTunes 11, it opens in the Albums view, presenting the contents of your entire music library. This view is not that different from the album, grid view of iTunes 10, except now the old, but once novel, cover flow feature has been removed.

features of itunes 11

The new user interface is one of the ways Apple is suggesting you navigate the new iTunes. However, if you want to get back to the old iTunes, you can do so by simply clicking on View > Show Sidebar, and you will discover that all your playlists and the old door to the iTunes Store and your mobile devices are still there.

itunes 11 new features

But let’s get back to the new interface of iTunes (which requires you to hide the old sidebar to fully use the new interface). Notice alongside the Albums view of the new iTunes, you can view your iTunes library content from one of five other views - Songs, Artists, Genres, Videosand Playlists. The latter will reveal the traditional playlist sidebar that you’re familiar with. More about that later.

itunes 11 new features

Notice also to the right of these views are two other buttons, one for accessing your supporting iDevices, such as the iPhone; and clicking the other one takes you out of your music library and opens the iTunes Store.

itunes 11 new features

The New Interface

You can control all the main features of iTunes from this new interface. So now when you click on an album in your library, it reveals all the songs in that album. Notice also that the background color for the expanded album view matches the colors of the selected album itself.

itunes 11 new features

You can play, shuffle, and rate songs in the expanded view, and if you want to view other songs and albums by a selected artist or group, you can click on the “In the Store” button and that content will open without taking you outside of your music library.

itunes 11 new features

There’s also a pop-up menu that you can access by clicking on the arrow button in the expanded album view. This menu includes features for creating a genius playlist using a selected song, adding a song to the “Play Next” list (more about that later), locating the song in the iTunes Store, or linking to the selected song in Artist view.

itunes 11 new features

Up Next

Another new handy feature in iTunes 11 is Up Next. When you’re playing a song in a playlist or album, clicking the Up Next button next to the player controls will show you just that, the songs or other iTunes items that are coming up next. There is also a little clock icon which shows a list of the most recent songs, podcasts, or TV shows, etc, that you have played. It looks as if that list continues to grow until you clear it.

Up Next iTunes

Up Next is useful for say skipping to a different song in the list, but you can also select and re-arrange tracks in Up Next or delete a track from from the list.

Viewing & Creating Playlists

If you have created a lot of playlists in iTunes, you probably will want to browse and navigate your library in that view. Selecting the Playlist view will reveal its contents of a currently selected playlist, but it will also reveal a sidebar list of all your playlists, similar to how it was setup in iTunes 10. But this sidebar will not include your iOS devices or the link to iTunes Store – just your playlists.

ITunes playlists

In the Playlist view, you can use the View button on the upper-right to browse a selected playlist in the List, Grid, or Artist view. You can also click the Edit button to add songs to a playlist. Just drag the songs to the playlist. This new interface also makes it easier to edit your current Smart Playlists. When you select one of your Smart playlists, the Edit button will replace the Add To button in the upper-right.

ITunes 11 Playlist View

When you want to create a new playlist or smart playlist, just click on the plus button at the bottom-left of the interface. You must be in the Playlist view to access this feature.

New playlist

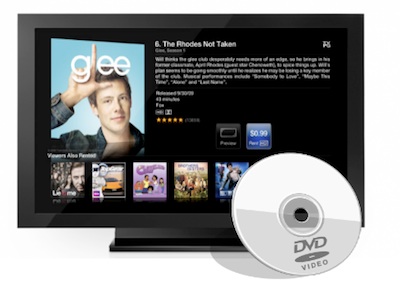
Notice also under the gear button, Apple also has resurrected the ability to burn a playlist to a CD, as well export the data of selected tracks.

ITunes burn playlist

When you’re in the expanded view of a selected album, you can also drag one or more songs to the right side of the iTunes interface, and add that content to an existing playlist or to one of your iDevices. The right sidebar will only appear when you drag a track to the right side of the interface.

Add to playlist

The Mini Player

The other major new feature of iTunes 11 is the Mini Player. It mirrors the features of the main user interface of iTunes. You can switch to the MiniPlayer by clicking on Window > MiniPlayer, by using the keyboard shortcut, Option+Command+3; or you can click the MiniPlayer button on the top-right of the main interface.

When you hover your cursor over the MiniPlayer, it will reveal controls for playing, pausing, and skipping forward and backwards between tracks and other items.

ITunes Mini Player

You can also do searches using MiniPlayer, as well access the Up Next feature. The little arrow to the right of the currently playing track reveals the same menu items described above.

ITunes menu

You can also access AirPlay in the MiniPlayer as well. To get back to the main iTunes interface, you need to click on the little square button on the left side of the MiniPlayer (see screenshot above).

Remote

Following the release of iTunes 11, Apple also released version 3.0 of its free iOS Remote app. The newest features in Remote provide expanded ways to browse and control all the shared iTunes libraries on your network.

features of itunes 11

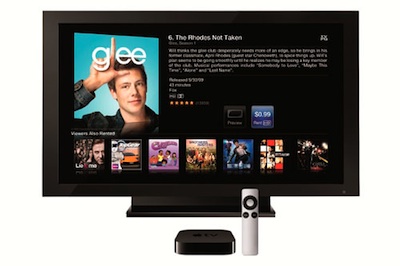
It nearly mirrors all the new features of iTunes 11, including player controls, Up Next lists, and the ability to browse playlists, albums, genres and other content. As with the old Remote you can also use it to control your Apple TV. One significant difference between the iPad and the iPhone version of Remote is that you can’t rate songs in the iPhone version of Remote, which is kind of a bummer.

Overall, the new re-design and features of iTunes 11 feel cleaner and more user friendly. However, if you’re new to iTunes, or you have always found it bloated with too many features to wrap your head around, the update may not make such a huge difference to you.

Source: http://www.makeuseof.com/tag/new-features-of-itunes-11/

iTunes 11 Tips:

iTunes 11 Features for Mac and Windows

Share this post
Repost0
December 12 2012 3 12 /12 /December /2012 09:58

convert m4v to mp4

With a 1GHz dual-core processor, a WVGA (800 x 480) display and a 5-megapixel camera, HTC Desire X is one of the coolest HTC smartphones. Aimed at customers of the HTC Desire, launched in 2010, the HTC Desire X has a 4 inch diagonal screen, and draws strong resemblance with HTC's 2012 flagship product, the HTC One X. It runs Android 4.0 Ice Cream Sandwich, skinned with HTC's Sense user interface. In the looks department, it's basically a miniaturised version of HTC's quad-core flagship, with a sloping metal edge at the top and three touch-sensitive buttons beneath the screen. It's a very typical HTC design, so if you're an existing user it'll probably be right up your alley.

How Is It Reviewed on Engadget
htc desire x

Pros

Nice look and feel
Vibrant display
Sense should please owners of previous HTC handsets, newcomers to Android

Cons

Dated specifications
Occasional performance glitches

Conclusion

If you're looking to make the leap from featured phone to something a little smarter, this is an ideal stepping stone, but don't be surprised if in 12 months you're wanting to upgrade again.

DRM iTunes to HTC Desire X Converter

So if you have got HTC Desire X, you must like to watch videos on it when you on a trip or in your spare time. But did you ever purchase the movies, TV shows, music videos from iTunes store and have the need to watch those downloads on your HTC Desire X? If so, you will benefit a lot from this guide on how to transfer and watch iTunes movies on HTC Desire X.

Firstly you should know that movies bought or rented from iTunes are protected and can't play on your HTC Desire X due to Apple's DRM FairPlay policy. So you must use some tools to strip the DRM protection andconvert the iTunes movies to HTC Desire X compatible format, such as MP4. In a word, to play iTunes movies on HTC Desire X, you just need to find an iTunes video converter that is able to remove the DRM control.

In this case, you can try Tune4mac DRM iTunes to HTC Desire Converter, which is your best choice to remove iTunes DRM and convert iTunes movie purchases and rentals to MP4 for playback on HTC Desire X. Besides, it can also convert iTunes movies to other formats, like MOV, AVI, FLV, etc.

Download Mac iTunes M4V videos Converter      Purchase DRM iTune to HTC Desire X Converter

Steps to Sync iTunes M4V to HTC Desire X
add iTunes M4V files to converter
1
Import iTunes DRM Videos

After you downloaded and installed Tune4mac DRM iTunes to HTC Desire Converter, launch the program and click the "Add" button to add iTunes M4V videos you want to convert. Or you can also import the movies by dragging and dropping.

select MP4 as output format
2
Choose Output Format for HTC Desire X

Click "Profile" and select "Customized MPEG4". If you like, you can change the video resolution, encoder, frame rate, etc in the right part of the program.

start convert M4V to MP4
3
Begin Converting iTunes Movies to HTC Desire X

The last step is to click the "Convert" button on the main interface to start converting iTunes movies for playing on HTC Desire X. After the conversion, you can locate the DRM-free videos and mount your Desire X on to your computer via USB and copy the converted video files into it with ease.

Share this post
Repost0
December 11 2012 2 11 /12 /December /2012 04:13

Whatever you think of Windows 8, it’s certainly speedy. Windows 8 boots faster than previous versions of Windows, has lower memory usage, and has a desktop that feels nice and snappy. Like all versions of Windows, Windows 8 has a variety of settings you can tweak to speed things up and make it even faster.
make windows 8 faster

Some of the tips here also apply to previous versions of Windows, but Windows 8 has some new tricks up its sleeve. As always, there are trade-offs when using some of the below tricks – there’s no magic “Go Faster” button.

Disable Time-Wasting Animations

Windows 8 display animations when you minimize, maximize, open, or close application windows. The animations are slick eye-candy, but they do introduce a delay. You can disable the animations and window transitions will happen instantly, eliminating the delay.

To disable the animations, press the Windows key, type SystemPerformanceProperties, and press Enter. Uncheck the Animate windows when minimizing and maximizing option. You may also want to disable some of the other animations, such as the Fade or slide menus into view and Fade or slide ToolTips into view. This will make menus and tooltips snap to attention instead of fading in with an animation.

make windows 8 faster

Pinpoint Apps Using Lots of Resources

Windows 8’s new task manager allows you to easily pinpoint the programs slowing down your computer. To open the Task Manager, right-click the desktop taskbar and select Task Manager.  Click the More details option if you don’t see the full interface.

Applications using a lot of resources will be highlighted, making it easy to see which programs are using up your computer’s resources. This list also shows a simplified list of applications, which is easier to understand and skim than the old-style processes list (if you prefer the old-style process list, it’s still available on the Details tab).

make windows 8 fast

Manage Your Startup Programs

The Windows Task Manager now allows you to easily disable programs that start with your computer. Click the Startup tab in the Task Manager to access these options.

Windows also analyzes how long each program takes to start and displays this information in the Startup impact column. Select a program and click Disable to prevent it from starting with Windows, speeding up your startup process.

make windows 8 fast

Use Included Security Programs

Instead of installing third-party security suites that often slow down your computer, try using the included security applications. Windows now includes an antivirus – while it’s named Windows Defender, it’s basically the same as the popular Microsoft Security Essentials application.

make windows 8 fast

Windows 8 also includes a SmartScreen feature, which analyzes how trustworthy programs you download are. As in previous versions of Windows, Windows also includes a firewall that blocks incoming connections. If you want more settings and options, you may want to install a third-party security suite – but most users will find that Windows 8’s included security programs are finally complete enough to rely on.

Modify Power Settings

Windows 8 uses power plans to determine whether battery life or performance should be prioritized, just as previous versions of Windows do. To view your power plan settings, press the Windows key, type Power Plan, click Settings, and press Enter.

In the default Balanced mode, Windows automatically reduces your CPU’s speed when maximize speed isn’t needed. This saves power. To squeeze all the performance you can out of your hardware, you may want to try High performance instead. In High performance mode, your CPU’s speed is never reduced. It runs at full speed all the time.

However, this isn’t necessarily a good thing. Even high-performance gaming PCs are used for web browsing some of the time and it doesn’t make sense to run the CPU at full throttle while browsing the web. This just wastes power and generates additional heat.

Whichever plan you choose, make sure you aren’t using Power saver. This is only useful if you want to squeeze as much battery life out of your laptop as possible.

make windows 8 run faster

Put Your Computer To Sleep

One of Windows 8’s most controversial aspects is the way it buries the Shut Down option in a hidden menu. Microsoft wants to encourage you to use Sleep mode instead of shutting down your computer. When you use Sleep, your computer goes into a very low-power state that uses just enough power to keep your programs and open files active in your computer’s RAM. When you come back to your computer, it will resume from sleep almost immediately. Using Sleep instead of Shut Down can dramatically speed things up when you sit down at your computer.

You’ll find a Sleep option under the power button in the Settings charm. (Press Windows Key+C, click Settings, click Power, and select Sleep). Your computer’s power button may also be configured to use Sleep automatically. You can change this option by clicking the Choose what the power buttons do option in the Power Options window mentioned above.

make windows 8 run faster

Optimize Your Hard Drives

Windows 8 includes the standard Disk Defragmenter, now named the Optimize Drives tool. To access it, press the Windows key, type Defragment, click Settings, and press Enter. Note that Windows 8 automatically optimizes (defragments) your drive once per week by default. However, if you move a lot of files around, you may want to optimize your drives sooner.

As on previous versions of Windows, click the Analyze button to see exactly how fragmented your file systems are.

make windows 8 run faster

Control Windows Indexing

The Windows indexing service automatically scans the files on your computer and monitors them for changes, allowing you to quickly search for files without waiting. Indexing uses some CPU time (and uses more CPU time if you frequently change a lot of files) so disabling it can help you reduce CPU usage.

Bear in mind that indexing speeds up searches. If you regularly use the Files search feature on the Start screen or the search feature inside Windows Explorer, you won’t want to disable indexing. You should only disable indexing if you don’t use the search feature.

To disable Windows Search, press Start, type services.msc, and press Enter. Scroll down in the list, locate the Windows Search service, right-click it and select Properties.

windows-search-service

Set the Startup type box to Disabled, click the Stop button to stop the service, and click OK.

windows-search-service-properties

Instead of disabling the indexing service entirely, you may also want to control which folders Windows Search indexes. By default, it indexes your Users folders. if you have some folders full of files you don’t want to search, especially ones that frequently change, you may want to exclude these folders from being indexed. To control these settings, press the Windows key, type Indexing, click Settings, and press Enter.

make windows 8 faster

Source from: http://www.makeuseof.com/tag/how-to-make-windows-8-faster/

If you are just looking for a way to install Windows 8, please visit: How to Install or Upgrade to Windows 8.
Share this post
Repost0
December 11 2012 2 11 /12 /December /2012 03:52

Of all the default applications that come with the Mac OS X operating system, Preview might be the one I use the most. As picture viewers (and PDF readers) come, it’s an amazingly slick and powerful tool, doing everything you’d come to expect, and then some.

mac preview

That’s one of the most crucial issues with these kind of  apps – you take them for granted, and think you know them inside out, but the chances are you don’t.

Rather more likely is the fact that Preview is still hiding some succulent feature beneath its surface, because however lightweight it feels, make no mistake – it’s riddled with features. Below, we’ve listed ten Preview-related tips and features that you definitely need to know about.

1. Open Multiple Files In One Preview Window

Preview is very apt at handling multiple files at once. You can open one file after the other, creating a separate preview window for each file, but it’s much easier to work with multiple files in a single preview window.

mac preview

To do this, just select multiple files in Finder using your mouse or the shift and cmd keys, and open them. By opening all these files at once, they will show in a single Preview window, with a file overview in the Preview sidebar.

2. Delete Files

If you have multiple files open in a single preview window, you can use Preview to move one or more of these files to the trash. This is great for culling the bad pictures from a big selection of photographs or screenshots.

Select the files you’d like to delete among the thumbnails in the Preview sidebar, right-click and select Move To Trash, or press cmd+backspace.

3. Create A File From The Clipboard

Since Mac OS X automatically renders files from your screenshots, this feature isn’t often highlighted. However, if you copy a picture from a website, or copy a selection of another picture to your clipboard, it’s a great tool to have in your toolbox.

To create a new file from the clipboard, just select File -> New from Clipboard, or press cmd+N.

4. Manage & Merge PDF Files

You probably already know of Preview’s ability to read PDF files, but it can do much more with those PDF files than just showing them to you. Most of the tips above and below that apply to pictures also apply to PDF files. However, the one feature that stands out is Preview’s ability to manage and merge PDF files.

preview mac os

Rearranging PDF files in Preview is as simple as dragging the pages around in Preview’s thumbnail sidebar. You can even select multiple pages before rearranging them. Deleting a page works just as described for pictures above, you select one or more pages and press cmd + backspace to delete them from the PDF. Finally, to merge two PDF files, just open one file and drag another in Preview’s thumbnail sidebar.

5. File Sharing

It’s very easy to share your pictures or documents to friends and colleagues right from within preview. This includes emailing, using iMessage, AirDrop, Twitter, Facebook and Flickr.

preview mac os

To share a file from Preview, just press the share icon at the top of the document (which looks like a box with an arrow inside), and select one of the sharing options. You can also add the picture to iPhoto the same way.

6. Annotation Tools

Preview comes with a wealth of annotation tools. You can draw shapes, arrows and text boxes on any kind of document, with varying color and line width. When you’re browsing a PDF document, you can also use Preview to highlight individual sentences.

preview mac os

The full array of annotation tools becomes visible when you press the annotation icon next to the search field, or select Tools -> Annotate.

7. Select & Cropping Tools

You don’t need a copy of PhotoShop for rudimentary photo manipulation. One of the things that Preview does almost as well is extracting elements of an image. When you press the annotation icon (left of the search field), a number of selection tools appear to the right of your screen. These include a rectangular selector, elliptical selector, lasso selection, smart lasso and instant alpha.

about mac preview

Using smart lasso, click in an area and slightly drag your mouse in any direction to specify the amount of tolerance that should be used in marking out the boundaries of that area’s selection. You can then copy that selection to your clipboard and create a new document as outlined above, or press backspace to make that part of your image transparent.

8. Color Management

A different kind of photo manipulation is provided through Preview’s built-in color management. Again, you can view this option by pressing the annotation button next to the search field, or by selecting Tools -> Annotate.

about mac preview

Pressing the prism icon in the annotation bar will open the Adjust Color pane. Hear you can tweak the picture’s levels, exposure, contrast, saturation, sharpness, and more.

9. Built-In Version History

In later versions of Mac OS X, Preview comes with built-in version support. This means you can go back in time and go through a number of different iterations of your file, Time Machine-style.

about mac preview

To do so, go to File -> Revert To -> Browse All Versions, or press the little disclosure triangle next to a file’s name in the title bar and select Browse All Versions.

10. Lock That Document

As you’ve seen above, Preview provides a lot of ways to manipulate a document. Sometimes we’re looking for exactly the opposite: keeping it safe from careless hands. Luckily, Preview is able to lock a document on your request.

mac preview

To lock a document, press the disclosure triangle next to the document’s name in the title bar as show above. In the ensuing drop-down menu, select Lock. This is also where you’ll be able to later unlock the document.

Source from: http://www.makeuseof.com/tag/ten-tips-you-need-to-know-about-mac-preview/

Other Applications for Mac:

iTunes Video DRM Removal Tool for Mac

iTunes Audio DRM Removal Tool for Mac

Share this post
Repost0
December 11 2012 2 11 /12 /December /2012 03:40

It seems that most of us used to downloading and enjoying movies, TV shows and music from iTunes Store. However, iTunes Store also provides with numbers of audiobooks in M4B or M4A format. These audiobooks can be downloaded and transfered to iPod, iPhone or iPad for listening to. To our disappointment, Apple protects them with the DRM which makes it impossible for you to listen to iTunes audiobooks on MP3 player or other audio players.

So, if you have got a common MP3 player instead of the iPod, and you want to play iTunes audiobook on MP3 player, you may try to remove DRM from iTunes audiobooks. This article mainly introduces a useful DRM audiobook converter to you which can help you remove DRM and convert iTunes DRM audiobooks to MP3 or AAC formats for playing on common MP3 players or portable devices like Nokia Lumia 920/820. NoteBurner Audiobook Converter for Mac is just the top iTunes M4B/M4A audiobook converter recommended above.

free download of noteburner audiobook converter for mac       purchase noteburner audiobook converter for mac online

Step-by-step guide on how to convert DRM Audiobook to MP3/AAC on Mac:
add DRM audiobook
1
Import DRM Audiobook from iTunes

Download and install NoteBurner Audiobook Converter for Mac by clicking the "Free Trial" button above. Then launch it as the best Mac DRM audiobook converter before clicking the add button to load your audiobooks which are in M4B or M4A format.

adjust preference settings
2
Adjust Preference Settings

To convert iTunes Audiobook for MP3 player. You need choose output settings first. Click the Preference button, and then choose the format to MP3 from pull-down menu. Also the AAC is fine for playing on MP3 players. After that, just click the convert button on the main interface to start to convert DRM Audiobook to MP3 on Mac.

split converted audiobook
3
Split Converted MP3 file

After the conversion, the converted audiobook will be displayed in the file list of the program. NoteBurner iTunes Audiobook Converter also enables you split the converted MP3 files. You can split the MP3 audiobooks into different parts by clicking the split button.

Share this post
Repost0