
The Downloads folder is often one of the most cluttered and disorganised places to be. With new files appearing regularly and often ignored soon after, it quickly grows past a manageable size and becomes a maze of lost and forgotten files.
It’s best to keep your Downloads folder clean and organised, but it’s a dull and altogether too frequent task. It only makes sense to let your computer take a share of the burden and have it clean your Downloads folder automatically.
1. Smart Folders
Smart folders aren’t really folders at all (they are in fact saved searches), but you can use them as such. Instead of actually moving your files around, you can look at them through different windows, only viewing a specific subset of files that interests you. If you use smart folders to clean up your Downloads folder, you’re only doing so in a superficial sense. You’ll still have a cluttered folder somewhere, but the files you’re looking at seem structured.
Using smart folders in this way has both its advantages and disadvantages. It’s very easy to set up and — depending on your rules — allows some overlap between folders. On the downside, you’re not actually restructuring or interfacing with the original folder, just search results.
Additional Layer of Indirection
Note that creating a smart folder does not change the contents of the original. If you still want the Downloads folder to be your main point of access, you should first create a separate folder to store your downloaded files (e.g. a Downloads_Files folder). Next, change the default download location in the preferences of your browser to that folder. Doing this leaves you able to put aliases to your smart folders in your original Downloads folder.
 Folder image")
If that seems like too much work, you can leave your setup as is, and put your smart folders somewhere else. You can access them from your sidebar, or create a separate folder for them (e.g. a Downloads_Smart folder, like in the screenshot above).
Creating a Smart Folder
Use Finder to navigate to the folder where your downloaded files are. Press cmd+alt+n or select File > New Smart Folder. This will put you in the familiar search window. Ensure you’ve selected the correct folder, because Finder has a tendency to revert to searching your entire computer (which is not what we want).
 Folder image")
Tweak your search until you’ve narrowed down the results to your preference. You can search for keywords in the top right, or add more specific rules by clicking the little plus icon on the far right. Rules can be used to filter on a wide variety of attributes. Usually, you’ll filter on Kind, Date, Name or Contents, but you can select on all kinds of more specific metadata.
 Folder image")
By default, all rules must be satisfied for a file to pass the filter. If you want to get more creative with rule combinations, hold the option (alt) key while adding a new rule. You’ll be able to specify whether any, all or none of a subset of rules must be satisfied.
 Folder image")
Press Save when you’re finished. You can save the search to the default location and choose whether you want to add a shortcut to your sidebar. To add the smart folder to your regular folder structure, navigate to the saved search (if you used the default location, use Go > Go to Folder… > ~/Library/Saved Searches) and create an alias with Right-click > Make Alias.
2. Automator
If you’re looking for a solution with a bit more muscle, maybe Automator provides the solution. For those of you that don’t know Automator yet, it’s a drag-and-drop GUI tool for creating macros and applications that ships with Mac OS X. In contrast with Smart Folders, Automator doesn’t just present you with a cleaner view of your Downloads folder. You can use Automator to rename, move, or even delete files that meet certain criteria.
Automatically Sort Files By Type
We’ll use Automator to automatically process files that are added to your Downloads folder. They’ll be sorted by type or extension, but the same process applies for sorting your files on other criteria.
Start by creating the folders you want to move your files to during sorting. I added several new folders to my Downloads folder: Documents, Archives, Pictures, Video.
 Folder image")
Fire up Automator and create a new Folder Action. For automatically cleaning up folders, Folder Actions are a godsend. These macros are linked with a single folder and triggered whenever new items are added to the folder.
 Folder image")
Having created a new Folder Action project, you need to specify the folder it is attached to. Notice the drop down menu at the top of the screen and select the Downloads folder.
 Folder image")
When new files are added to the specified folder, this Folder Action will be triggered. The files that were added are passed along to the workflow, so you can decide what to do with them. By chaining the right actions in our workflow, we’ll get Automator to behave exactly like we want to.
Drag the Set Value of Variable action from the Utilities category to the bottom of your workflow and give the variable a name. This allows us to pull the original input (the files that need to be sorted) back up at a later point in our workflow.
 Folder image")
Add another Filter Finder Items action to the bottom of your workflow. This time, we’re selecting the files we’re interested in for one specific category. Say, all Documents. You can either filter by Kind, or for more precision, list the permitted file extensions (and allow files to pass if Any of the conditions are met).
 Folder image")
To finish up, add the Move Finder Items action to the bottom of your workflow and indicate the associated category folder that you created at the start.
 Folder image")
At this point, you’ve sorted files of one specific kind. Now, to sort the files for the other categories, we’re going to use the variable that we set earlier. Add the Get Value of Variableaction to the bottom of your workflow and select the variable from before.
 Folder image")
Now you can repeat the process of filtering and moving files like we did with the previous two actions. For each remaining category, just chain Get Value of Variable, Filter Finder Items, and Get Value of Variable. That’s it! Press save and you’re done.
Application instead of Folder Action
Instead of using Folder Actions, you could create an Automator Application. In contrast to Folder Actions, an Application isn’t triggered automatically when files are added to the folder, so you have to run it manually or schedule it to run periodically.
 Folder image")
The Application isn’t triggered when new files are added to the folder, so before we do any file manipulation, we need to retrieve the files from your Downloads folder. We use a sequence of two Actions for this. From the Files & Folders category in the left sidebar, drag Get Specified Finder Items to the top of your workflow and add your Downloads folder to the folder list.
 Folder image")
Again from the Files & Folders category, drag Get Folder Contents to the end of your workflow. It’s advised to leave the Repeat for each subfolder found option unchecked, because Automator won’t distinguish between file locations when it passes your files along.
First, we’ll make sure to define the exceptions: the files and folders we don’t want to sort. From the Files & Folders category in the application sidebar, find the Filter Finder Items action and drag it to the bottom of your workflow. Add a rule to weed out each of the category folders you previously created. Optionally, you can also choose to ignore files with a specific color label.
 Folder image")
If you configured your workflow so it resembles the screenshot above, you’ll receive all files and folders located in the base level of your Downloads folder. Now, by chaining the right actions like before, we can get Automator to do what we want! For instance, you could follow the steps outlined in the previous step (starting with Set Value of Variable) and create an application that sorts your Downloads per category whenever you run it.
Only Reorganise When Too Large
If there aren’t too many files in your Downloads folder, a single unorganised directory can still give a clear overview. In fact, it may sometimes be preferred. A small adaptation to the workflow can make it so it only executes if your Downloads folder grows past a certain size. For instance, you can choose to leave your Downloads folder as is, but automatically reorganise it if there are more than 20 files in it.
 Folder image")
Just above the first Filter Finder Items action, add a Run AppleScript action and paste in the following AppleScript code:
on run {input, parameters}
 tell application "System Events"
 set numberOfFiles to (number of files in folder "~/Downloads")
 end tell
 if (numberOfFiles > 20) then
 return input
 end if
 end run
This snippet checks the total number of files in your Downloads folder. If there are more than 20 files in it, it just passes its input along and your files are processed as before. Otherwise, it doesn’t pass anything to the next action in your workflow, leaving the subsequent actions nothing to work with. If you want, you can customise the script and change 20 to another value.
Scheduling an Application
Up until now, we’ve seen two ways to trigger a workflow. A Folder Action runs whenever new files are added to the Downloads folder and an Application that is triggered manually. There’s a third option, somewhere down the middle. You can use Mac's Calendar application to trigger your Application periodically. For instance, you could clean your Downloads folder every day around midnight, or even at the end of a week.
Open the Calendar application and create a new calendar for your Automator applications using File > New Calendar. Creating a separate calendar is not strictly necessary, but it allows you to hide the events so your window doesn’t become cluttered.
 Folder image")
Hold the plus icon and select your Automator calendar to create a new event. Give it an easily distinguishable name like ‘clean Downloads folder’ and press enter.
 Folder image")
The event will be created on the current day, but we can still change that. Double-click on the event in your calendar to change the specifics. Change the date and hour to the time you first want your application to be triggered. Under repeat, choose the frequency at which you want your application to be scheduled to run.
 Folder image")
Select alert > Custom > Open file and browse to the Application you created using Automator. In the bottom drop down menu, select At time of event to execute the application in sync with the event and confirm.
 Folder image")
Now, every time one of these recurring Calendar events come to be, your application will be executed and your Downloads folder will be put in order. Finally, clear the checkbox next to the Automator calendar to hide these events from view.
That’s It!
We’ve shown you a few ways to keep your Downloads (or any folder on your Mac) clean and tidy, by hiding, sorting or even deleting items. You’re free to use your own rules or schedule – or simply run your Automator app every time you need it. We’d love to know how you make sure your Downloads remains manageable, so share your process in the comments below!
Source: Makeuseof.com


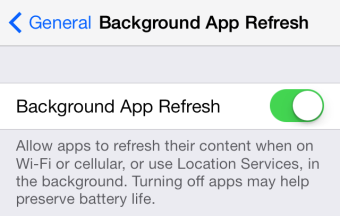 1. Disable background app updates
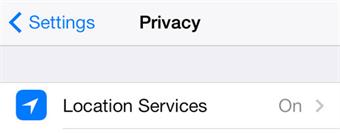 This is another massive battery hog. If you seldom use this feature, you can consider turning it off in order to improve iOS 7.1 battery life. And it's also a way to protect your privacy by disabling this feature. Go to Settings > Privacy > Location Services and slide to OFF. Of course, you can choose to disable the location services for specific apps too.
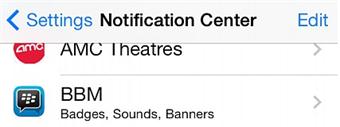 It's always annoying to receive notifications from every single app on iOS 7.1. And besides that, the push notifications are also big-time battery life suckers. To increase battery life and make it efficient on iOS 7.1, you can go to Settings > Notification Center to disable notifications for those apps you don't require notifications for.
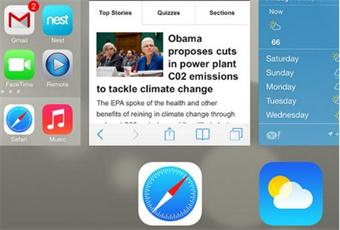 4. Shut down all unnecessary apps? No, leave them running
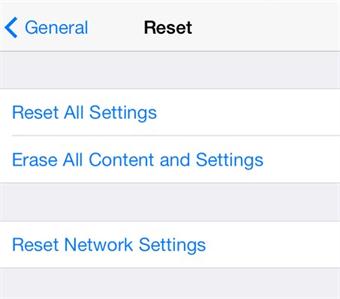 The last option to improve battery life on iOS 7.1 is to reset your devices completely. This should be the last way since it would wipe all the data from your iPhone or iPad. But don't worry. If you lost all personal info after restoring the device, you can simply recover them with some 3rd-party recovery tool like Dr. Fone